My art teacher once gave me a bit of advice about making art. I remember I was working in oils on a coastal scene, so intent on getting part of the water right that I didn’t realize my brush strokes were creating a fog on the shoreline. I was a little dismayed when I discovered it, perfectionist that I am, but Mrs. Brill said she thought that I should leave it. She said every painting sort of has a mind of it’s own, that it’s good to go with the unexpected things that happen and see where it can lead. She was right, and I kept the fog.
I’ve always remembered her advice and have since adopted it as one of my rules for flower arranging. I try to look at the shapes of flowers, see how they bend or curve, and let that decide where they fit into the bouquet. Instead of forcing a shape, I’m learning to let the branches, the flowers, and the foliage show me what is there.
In the interest of keeping it real here, I should probably tell you that I’ve never had any formal training in floral arranging. All I have is a decade or two of trial and error and a love for anything pretty. I’m convinced that anyone with an appreciation for flowers and beautiful things can learn how to make pretty bouquets, and that’s why I’m sharing this little tutorial with you today. Maybe it can spark some ideas for making your own arrangements. You know Mother’s Day is just around the corner. Wouldn’t it be fun to pull together a little something special to give to your mom?

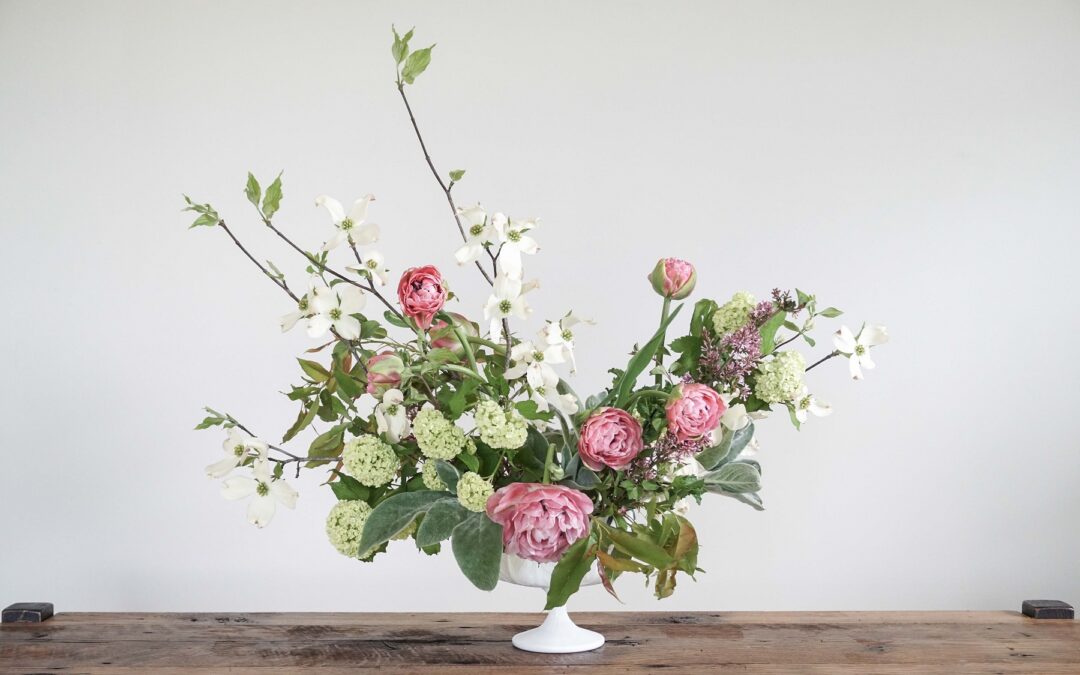
Let’s start with the vase. I used a compote since I love how it lifts an arrangement high enough that some of the flowers can sweep down onto the table for a bit of dramatic flair. I used green florist’s tape to make a grid to support the flowers and I’ve also attached a pin frog to the bottom of the bowl since it’s a little tough to make tall things stay put in a shallow bowl. I forgot to get a picture of the frog, so if you’ve got a picture in your head of a little green amphibian with pins falling out of its mouth, search for ‘pin frog’ online. It’s not quite that scary, I promise.

I set the shape of my bouquet with a few strong dogwood branches. It helps if you hold up several branches at a time and do a couple of loose combinations in the air to see what possibilities there are.

After I poked a few branches down into the frog, I started filling in along the same lines with a bit of green. The greens I’ve added here are something we fondly refer to as roadafolia. In other words, it’s foraged goods and we have no idea what its proper name is. Your backyard, roadsides, and wooded areas are great places to sniff out beautiful greens to take your bouquet from ordinary to gorgeous. I might suggest that you become at least mildly familiar with any poisonous plants in your region, though, so you don’t end up sending someone to the emergency room by accident. Also, keep an eye out for ticks.
Another tip: woody stems can’t drink water through their bark, so if you split the stem about an inch up the bottom they’ll have a chance to drink and will last longer. I’d also recommend giving your flowers and foliage a fresh, diagonal cut before putting them into your vase.

I tucked in a couple of fuzzy lamb’s ear leaves at the base to help anchor it.

Next I added snowball and mint. Whenever possible, I love to use flowers or herbs that smell delicious. Make it easy on the eyes, yes, but also give your nose a treat. You might want to use a bit of caution when it comes to scented blooms if your bouquet is a gift or you suffer from allergies. Some dear soul once gave me a blooming hyacinth and I ended up with a full blown sinus infection before I thought to set the pot outside. That was the gift that kept on giving, but not quite in the way one would have hoped.

More snowball and roadafolia.

I like to occasionally take a step back and see what needs editing. Don’t be afraid to chop things down if it gets a bit bushy and out of control. I wanted this bouquet to feel light and airy and realized the greens on the left were just too long. I wanted those little dogwoods to dance up over the top of the arrangement.

Tucking more greens in down low ensures the floral tape gets covered.

I added a couple sprigs of lilacs, keeping them in line with the shape already set with the dogwood branches.

Now for a few focal flowers to make the whole thing sing. These double tulips are some of my favorites with their long stems and huge peony-like heads. I can never get enough.
Refresh the water daily and enjoy for a week or more.
Rosita


👌🏻 Rodafolia!😂😂❤️❤️
🙂 I think you may have been the one who introduced us to roadafolia all those years ago!
I enjoyed your tutorial and love the airy, beautifully-branching bouquet!
Thank-you Karyn!